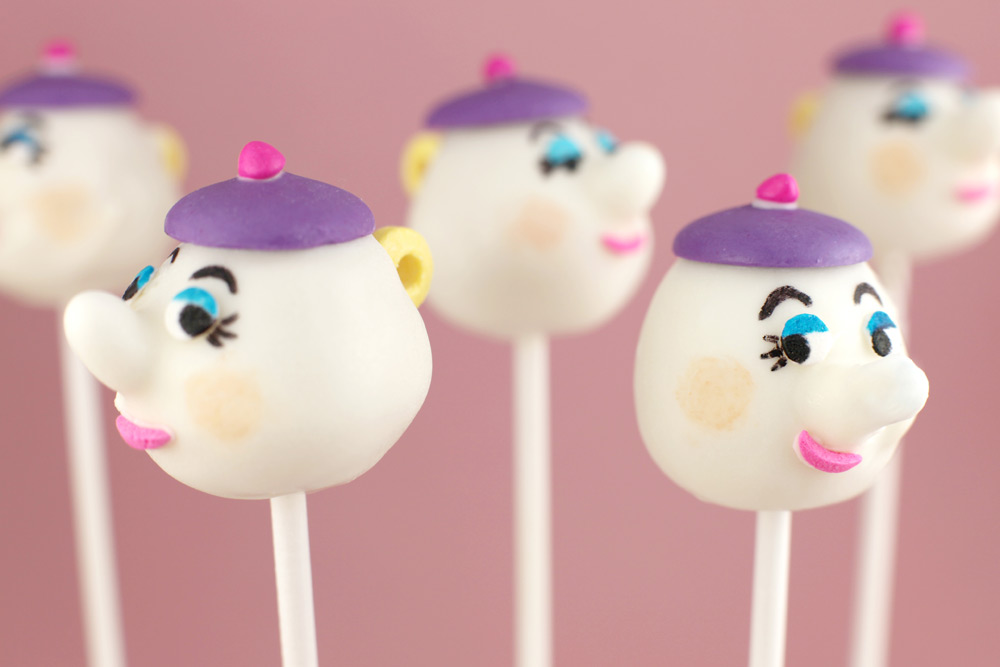
This past weekend, I threw my best friend an tea party for her bridal shower. i thought it would be a great idea to make teapot cake pops to tie in with the "tea party" theme. The intent was to make them look like Mrs. Potts from
Beauty and the Beast but the result was far from that. Let's just say the pops definitely tasted better than they looked. It was a lot harder than I thought putting these puppies together. (luckily I only had to make 10!) I must have shouted out "DISASTER" about 20 times while trying to coat the pops. This is what they were supposed to look like:

But instead they came out looking like this:

I should have actually made these for the Bachelorette party since everyone keeps telling me how phallic they look. Like I said, tasted way better than they looked people!
Luckily, I also made these chocolate chip tea cake cookies as part of the favors which made up for my sad looking teapot cake pops.

These bite sized cookies were the perfect pair to the personalized tea bags. Here are the recipes for both goodies:
Red Velvet Cake Pops1 box cake mix (bake as directed on box for 13x9 cake)
One 16-ounce can of ready-made frosting
Wax paper
Baking sheets
White candy coating
Purple candy melts (teapot lid and base)
White licorice pastilles for spout (we used Good & Plenty)
Yellow candy necklace pieces (handle)
Pink rainbow chip sprinkles (knob on lid)
Pink colorstick sprinkles (mouth)
Pink, blue and white confetti sprinkles (eyes and base decorations)
Blue, black and peach edible ink pens (facial details)
Toothpicks
Paper lollipop sticks
Styrofoam block
Note: One cake makes about 48 cake pops. If you don't need that many, then cut cake in quarters and freeze cake sections for another day. You'll need at least one ounce of candy coating for each cake pop you plan on dipping and more for any extra decorating.
Instructions:
1. After cake is cooked and cooled completely, crumble into a large bowl. Note: Light-colored cakes will work best with white candy melts. Darker colored cakes may show through the coating.
2. With a large spoon, mix crumbled cake thoroughly with about 3/4 of the can of frosting. You won't need the rest.
3. Roll mixture into quarter size cake balls and place on a wax paper covered baking sheet. Place cake balls in the freezer for about 15 minutes to firm them up. You can transfer them to the refrigerator to keep chilled and avoid freezing
4. When they are firm, shape the balls so the bottom is slightly fuller than the top. You want the size to be proportional to the candy melts as pictured.
5. Return the cake pops to the refrigerator to maintain firmness.
6. Melt white candy coating in a heat-proof plastic bowl so that the coating is 3-4 inches deep for easy dipping. Melt in the microwave in 30 second intervals on low, stirring in between. Repeat until melted and smooth.
7. Remove a couple of cake balls at a time from the refrigerator to work with.
8. Dip the tip of a lollipop stick into the melted coating and insert into the bottom of the teapot. Then, dip one end of a white licorice candy spout into the melted candy coating. Attach the spout to the side of the cake pop and the coating will set like glue.
9. Place in a styrofoam block to dry. After a few minutes you can carefully dip the entire cake pop with spout attached into the bowl of melted candy coating. Dip and remove in one motion without stirring. Make sure the entire cake ball is covered. Using a deep bowl is helpful here. If your coating is too thick, you can add a few drops of vegetable oil or shortening to help thin it and make it easier to work with. Remove and allow any excess coating to fall off the pop and back into the bowl.
10. Before the coating sets, attach one purple candy melt on top of the cake pop for the lid and one yellow candy necklace piece in the back for the handle. Repeat with the remaining pops. Place in a styrofoam block to dry.
11. When dry, use a toothpick to dot a tiny amount of coating in position for the eyes and attach one white confetti sprinkle for each eye. Use the same technique to attach the rainbow chip for the knob and the colorstick sprinkle for the mouth.
12. Use a black edible ink pen to draw pupils, eyelashes and eyebrows. Use the blue edible ink pen to draw on eyelids and the peach pen to draw the blush.
Recipe from
BakerellaChocolate Chip Tea Cake CookiesIngredients:
2 cups all-purpose flour
½ lb. (2 sticks) butter
½ cup powdered sugar, sifted
1 teaspoon vanilla extract
1-1/2 cups miniature chocolate chips, divided
Directions:
Preheat oven to 350.
Beat butter and sugar with an electric mixer until fluffy. Add vanilla and mix well. Gradually add flour. Stir in 1 cup miniature chocolate chips.
Shape into 1” balls and place 2 inches apart on an ungreased cookie sheet. Bake 10-12 minutes.
Remove to wire rack to cool.
Place ½ cup miniature chocolate chips in a sealed plastic bag and microwave until melted; about 30 seconds. Snip off a small corner of the bag and drizzle chocolate on top of cold cookies. Chill for 5 minutes or until chocolate is set. Store at room temperature.
Recipe from
BrowneyedbakerTakeaways-Clearly I need to work on my Cake Pop decorating skills. What I found helpful during this process was adding a few drops of oil to the melted chocolate. This thinned out the chocolate and made it much easier to work with. If anyone has any suggestions on how to make it look so smooth, I'm all ears!
-Also, when working with the cake pops, make sure you either refrigerate or freeze for a few minutes before dipping in the chocolate. This will prevent any cracking or breaking.
-Allow ample time if this is your first time for the cake pops. It really is a labor of love. :)


 But instead they came out looking like this:


